
Self-hosted ingress proxy & VPN tunnel. Securely exposes private local & Docker-based services to the Internet, with free, automatically renewable SSL certificates.
Powered by WireGuard, CoreDNS and Caddy
Features • Preparation • Quick Start • How it works • Security • Troubleshooting • Sponsorship
wireport is a self-hosted ingress proxy and VPN tunnel that securely exposes private local and Docker-based services to the Internet, with free, automatically renewable SSL certificates.
- Exposing local and Docker-based services running in a local network (e.g., on the local machine, on a corporate network, on a NAS, or on a home server) to the Internet
- Secure tunneling into remote development/staging/production environments to facilitate debugging and troubleshooting of remote Docker-based services
- SSL/TLS termination with 100% free and automated certificate provisioning and renewal
- Reverse proxy with support for HTTP(S) 1/2/3, WebSocket, gRPC (over HTTP/2) and TCP/UDP (Layer-4)
- Securely connect locally running services to remote infrastructure for debugging complex production issues
- Secure access to internal docker-based services and admin dashboards
- Automatic service discovery and hostname resolution (remote service hostname = Docker container name)
- Multiplatform CLI (Linux, macOS, Windows — ARM64 & AMD64)
- Secure VPN tunneling (WireGuard)
- Self-hosted and open-source
- High performance with a low memory footprint
- Easy, declarative tunnel configuration via docker labels
- Manage remote Docker workloads locally — from your laptop,
docker/compose --contextover the VPN to the server to manage containers as if they were local (no SSHing) - Quick and easy start in self-hosted mode in just two commands - no tinkering with docker/compose files
 |
 |
|---|---|
| Ingress proxy with free, automated SSL certificate provisioning and renewal | Hostname resolution (hostname = docker container name) |
- GATEWAY – a Linux-based machine with Docker installed, a public IP address, and the following open ports: 80/tcp, 443/tcp, 4060/tcp, 51820/udp and 32420-32421/tcp+udp. This node acts as the ingress gateway and an entry point to your published services.
- CLIENT – any number of laptops/PCs that will connect to the WireGuard network to manage the ingress network and expose services from their local machines to the Internet.
- SERVER (optional) – one or more Linux-based machines (with Docker) that run the workloads you want to expose. These nodes join the same private WireGuard network, provided by the GATEWAY.
 |
 |
|---|---|
| Ingress Proxy and VPN tunnel - conceptual scheme | Docker Service Discovery - conceptual scheme |
Internet
    ↕
Caddy (tcp/udp/http/https/websocket forwarding & automated SSL renewal)
    ↕
[GATEWAY] ↔ WireGuard VPN ↔ [SERVER] ↔ [Docker Containers]
    ↕
WireGuard VPN
    ↕
[CLIENT] ↔ [Local Services]
Watch a quick setup tutorial on YouTube:
 |
|---|
Before getting started with wireport, you need to prepare your CLIENT, GATEWAY and (optionally) SERVER nodes. This section covers all the prerequisites and setup requirements for each node type.
- Installed WireGuard client: required for connecting to the VPN tunnel between GATEWAY, SERVER and CLIENT nodes of wireport (official WireGuard website)
- Installed wireport CLI: required for managing services, exposed via ingress-proxy, as well as gateway, server and client nodes
via Homebrew (macOS, Linux)
brew install MultionLabs/wireport/wireportor
via scoop (Windows)
scoop bucket add wireport https://github.com/MultionLabs/scoop-wireport
scoop install wireport
or
from binaries (Linux, macOS, Windows)
Links to latest pre-built packages & unsigned binaries (Linux, macOS, Windows)
| Platform | AMD64 | ARM64 |
|---|---|---|
| macOS (.pkg) | wireport-macos-amd64.pkg | wireport-macos-arm64.pkg |
| macOS (.zip) | wireport-macos-amd64.zip | wireport-macos-arm64.zip |
| Linux (.tar) | wireport-linux-amd64.tar | wireport-linux-arm64.tar |
| Linux (.deb) | wireport-linux-amd64.deb | wireport-linux-arm64.deb |
| Linux (.rpm) | wireport-linux-amd64.rpm | wireport-linux-arm64.rpm |
| Windows | wireport-windows-amd64.zip | wireport-windows-arm64.zip |
Installing from a .deb package on Ubuntu or Debian (amd64):
wget https://github.com/MultionLabs/wireport/releases/latest/download/wireport-linux-amd64.deb && \
sudo dpkg -i ./wireport-linux-amd64.deb
Installing from an .rpm package on Alma or Rocky (amd64):
wget https://github.com/MultionLabs/wireport/releases/latest/download/wireport-linux-amd64.rpm && \
sudo rpm -ivh ./wireport-linux-amd64.rpm
Installing from a .tar package (e.g., on Arch; amd64):
wget https://github.com/MultionLabs/wireport/releases/latest/download/wireport-linux-amd64.tar && \
sudo tar -xvf wireport-linux-amd64.tar -C /Since the binaries are not signed with commercial certificates, your operating system may prevent them from launching by default.
You will need to manually allow them.
When you try to launch the program, you may see a warning similar to:
Windows protected your PC
Windows Defender SmartScreen prevented an unrecognized app from starting.
To proceed:
- Click More info.
- Click Run anyway.
This will start the application despite the warning.
When you attempt to open the app or installer, you may see:
"wireport cannot be opened because the developer cannot be verified."
To allow it:
- Open Finder and locate the application or
.pkgfile. - Right-click (or Control-click) the file and select Open.
- You will see a similar warning, but this time it includes an Open button.
- Click Open to confirm you trust the file.
Alternatively, you can allow the app through System Preferences:
- Open Apple Menu > System Settings > Privacy & Security > General.
- You will see a message that the app was blocked.
- Click Allow Anyway.
- Then, try opening the app again.
Note:
- These steps are necessary only once per file.
- If you have any concerns about file integrity, consider verifying checksums or building binaries from the source code yourself.
- In enterprise environments, administrators can whitelist the binaries using Group Policy (Windows) or Gatekeeper settings (macOS).
- A small Linux node with a Public IPv4 address (any 5$/month Ubuntu/Debian/Rocky/Alma-based VPS would typically suffice; e.g., this one (ref. link))
- Docker Installation: the gateway must have Docker installed and running (e.g., tutorial for Ubuntu)
- SSH Access: the SSH account used for gateway bootstrapping must have privileges for executing Docker commands
- Domain Ownership: you must own or control the domains you plan to use with wireport
- DNS Configuration: if you plan on exposing local services via your own domain name, you need to configure respective DNS A-records first
Before bootstrapping your wireport gateway node, you need to ensure proper DNS configuration and gateway node firewall setup.
Instructions
If your use case does not rely on DNS-names (e.g., you're publishing services on bare IP address of the gateway node and do not use free, automatically managed SSL certificates), you may skip the whole DNS configuration step.Otherwise, for wireport to correctly expose your local services via publicly available domain names, as well as for you to make use of automatically managed free SSL certificates, you must configure DNS records pointing to your gateway's public IP address (replace 140.120.110.10 with your gateways's node public IP):
-
A Records: Create A records for each domain you plan to use with wireport, pointing to your gateway's public IP address
demo.example.com A 140.120.110.10 api.example.com A 140.120.110.10 *.example.com A 140.120.110.10 (wildcard for subdomains) -
Propagation Time: DNS changes can take up to 48 hours to propagate globally, though most providers complete propagation within 15-30 minutes
-
Verification: You can verify DNS propagation using tools like:
nslookup demo.example.com
dig demo.example.com
Instructions
For wireport to operate correctly on your gateway node, the following ports must be open and accessible from the Internet on that gateway node:| Port | Protocol | Purpose |
|---|---|---|
| 22 | TCP | SSH access for wireport installation. If you use custom SSH port, make sure to open that custom port |
| 80 | TCP | HTTP traffic and free SSL certificate validation |
| 443 | TCP | HTTPS traffic |
| 4060 | TCP | wireport control channel |
| 51820 | UDP | WireGuard VPN tunnel |
| 32420-32421 | TCP/UDP | Reserved ports for exposed services |
Ubuntu/Debian (UFW):
sudo ufw allow 22,80,443,4060/tcp
sudo ufw allow 51820/udp
sudo ufw allow 32420:32421/tcp
sudo ufw allow 32420:32421/udp
sudo ufw enable
CentOS/RHEL (firewalld):
sudo firewall-cmd --permanent --add-service=ssh
sudo firewall-cmd --permanent --add-service=http
sudo firewall-cmd --permanent --add-service=https
sudo firewall-cmd --permanent --add-port=4060/tcp
sudo firewall-cmd --permanent --add-port=51820/udp
sudo firewall-cmd --permanent --add-port=32420-32421/tcp
sudo firewall-cmd --permanent --add-port=32420-32421/udp
sudo firewall-cmd --reload
Cloud Provider Firewalls:
- AWS: Configure Security Groups to allow the required ports
- GCP: Configure Firewall Rules in VPC
- Azure: Configure Network Security Groups
- DigitalOcean: Configure Cloud Firewall
- A Linux node (could be a Linux machine behind NAT [e.g., a home server] or a VPS; e.g., this one (ref. link))
- Docker Installation: the server must have Docker installed and running (e.g., tutorial for Ubuntu)
- SSH Access: the SSH account used for server bootstrapping must have privileges for executing Docker commands
Once GATEWAY and CLIENT node preparations are completed, the following two commands will help you bootstrap the gateway and expose your first service from your local machine to the Internet!
Run in your local terminal on your CLIENT machine:
wireport gateway up sshuser@140.120.110.10:22(replace SSH username, IP, and PORT with the real details of the GATEWAY machine)
This command outputs a WireGuard configuration -- import it into your WireGuard client on your CLIENT device and activate it before proceeding with the next command.
Sample output
🔒 Enter SSH password:
🚀 wireport Gateway Up
==========================

📡 Connecting to gateway...
   Gateway: sshuser@140.120.110.10:22
   Status: ✅ Connected

🔍 Checking current status...
   Status: ❌ Not Running
   💡 Proceeding with installation...

📦 Installing wireport...
   Gateway: sshuser@140.120.110.10:22
   Status: ✅ Installation Completed

✅ Verifying installation...
   Status: ✅ Verified Successfully, Running
   🎉 wireport has been successfully installed and started on the gateway!

   🔑 Applying Client Join Token: eyJpZCI6IjMxMGIyYTQz...

# # # # # # # # # # # # # # # # # # # # # # #
#       wireport config for WireGuard       #
# # # # # # # # # # # # # # # # # # # # # # #

[Interface]
Address = 10.0.0.2/24
PrivateKey = CDCH09W1+x4P+aZ3OIF2dnEhvYOms2RtV2ReIHqa/0I=
DNS = 10.0.0.1

[Peer]
PublicKey = AfYB6BMUMYDcIojecg7H5jhnDNzqIf56rXJ74md1Rw4=
Endpoint = 140.120.110.10:51820
AllowedIPs = 172.16.0.0/12, 10.0.0.1/24
PersistentKeepalive = 15

⤵ wireport WireGuard config has been dumped

   ✅ Client Join Token Applied

✨ Bootstrap process completed!
Advanced usage scenarios
Use SSH key with an empty passphrase and dump the WireGuard config straight to the file:
wireport gateway up sshuser@140.120.110.10:22 --ssh-key-path ~/.ssh/id_rsa --ssh-key-pass-empty > ~/path/to/wireguard-config.confImportant – firewall and other prerequisites
wireport gateway up expects that:
- the following ports must be reachable on the target GATEWAY machine before you run the command:
- 22/tcp (SSH)
- 80/tcp and 443/tcp (HTTP/HTTPS)
- 4060/tcp (Wireport control channel)
- 51820/udp (WireGuard)
- 32420-32421/tcp+udp (reserved ports for exposing services with wireport)
Example with UFW:
sudo ufw allow 22,80,443,4060/tcp
sudo ufw allow 51820/udp
sudo ufw allow 32420:32421/tcp
sudo ufw allow 32420:32421/udp
sudo ufw enable- Docker is installed on the target GATEWAY machine
- The account used for SSHing into the target GATEWAY machine has all the necessary permissions for managing Docker containers, images, and networks
wireport DOES NOT store SSH credentials
wireport relies on goph for handling SSH connections and executing commands on the target remote machines. The credentials are never stored by wireport and they only stay in the memory of your client device for the time of executing the commands (typically, a few seconds).
Run in your local terminal:
wireport service publish \
  --local  http://10.0.0.2:3000 \
  --public https://demo.example.com:443
(assuming 10.0.0.2 is the IP address of your CLIENT device in wireport network & there is a DNS A-record for the domain demo.example.com, pointing to your GATEWAY node's IP address)
🎉 Congratulations! Your first local service running on port 3000 is now securely accessible on the Internet at https://demo.example.com/. wireport automatically generates and renews SSL certificates for your domain.
Command and flags explained
This command supports different protocols (HTTP, HTTPS, TCP, UDP) and automatically provisions a free SSL certificate for the domain when an HTTPS-based URL with a domain name is specified in the --public parameter, provided that a correct A-record is set up in your domain provider's DNS settings and points to the GATEWAY machine.
- --local – address of the service on the machine where you run the command (or another CLIENT/SERVER node from the wireport-managed WireGuard network)
- --public – External protocol / hostname / port that will be reachable on the GATEWAY
Client Node Configuration is stored in ~/.wireport/<profile> folder.
Here <profile> equals default, unless it's explicitly overridden with WIREPORT_PROFILE environment variable (e.g., WIREPORT_PROFILE=dev wireport -v).
When you run wireport gateway up, the following happens:
- SSH Connection: wireport connects to your gateway machine via SSH
- Docker Installation Check: Verifies Docker is installed and accessible to the SSH user
- Container Deployment: Pulls wireport docker image (version matches your wireport CLI version) and starts
wireport-gatewayDocker container with:- WireGuard VPN server (port 51820/udp)
- Caddy reverse proxy (ports 80/tcp, 443/tcp)
- CoreDNS for service discovery (internal; not exposed to the Internet)
- wireport control plane API (port 4060/tcp; secure communication with TLS-encryption and mTLS-based auth)
- Network Setup: Creates a private WireGuard network (10.0.0.0/24)
- Certificate Generation: Creates client certificates for secure API communication and mTLS
- Configuration Storage: Stores all configuration in
~/.wireport-docker/gatewayon the gateway machine
When you run wireport server up, the following happens:
- SSH Connection: wireport connects to your server machine via SSH
- Docker Installation Check: Verifies Docker is installed and accessible to the SSH user
- Join Token Generation: Creates a secure token for joining the wireport network
- Container Deployment: Pulls wireport docker image (version matches your wireport CLI version) and starts
wireport-serverDocker container with:- WireGuard VPN client
- Docker network integration
- Service discovery agent
- Network Integration: Connects the server to the wireport-managed WireGuard network, provided by the gateway node
- Configuration Storage: Stores all configuration in
~/.wireport-docker/serveron the server machine - Background agent: The server container runs a reconciliation loop (every ~30 seconds) that:
- syncs node labels from the gateway database
- publishes/unpublishes gateway tunnels based on Docker container labels
- enables/disables optional features controlled by node labels (e.g. Docker socket exposure)
wireport supports declarative tunnel configuration via docker labels on SERVER nodes. Add labels to your docker-compose service definition (or equivalent):
wireport.service.local- local address of the service that should be exposed to the Internet; the service hostname in the address should match the container name of your docker servicewireport.service.public- public address of the service; the service will be available at this address; make sure to configure DNS to point to your GATEWAY node for domain resolution to work correctly
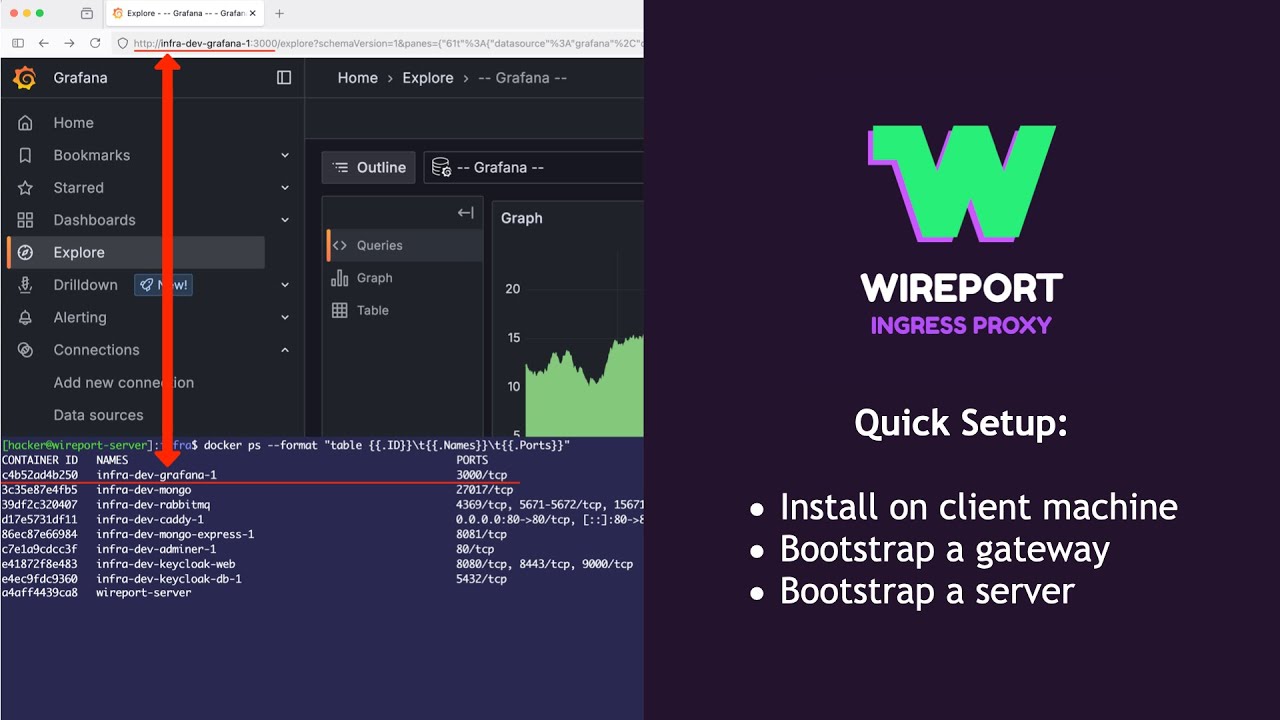
Sample docker-compose file for Grafana dashboard:
version: '3'

services:
  dev-grafana:
    image: grafana/grafana-oss:12.0.3
    env_file:
      - path: dev-grafana.env
        required: true
    labels:
      wireport.service.local: http://infra-dev-grafana-1:3000
      wireport.service.public: https://dev-grafana.my-services.com
    restart: always
    logging:
      driver: json-file
      options:
        max-size: 10m
After the container starts on a SERVER node, wireport automatically publishes or unpublishes the service on the GATEWAY when labels are added or removed — no manual wireport service publish required. Only tunnels defined by labels on containers running on that server are managed; publications created manually from a CLIENT are left unchanged.
The local hostname in wireport.service.local must match the Docker container name (not the compose service name, unless they are the same).
Server nodes store a list of string labels in the gateway database. Labels are useful as feature flags, automation hooks, or opt-in capabilities on specific servers.
Manage labels from your CLIENT machine (calls the gateway API over mTLS):
# NODE_IP = server's private WireGuard address (e.g. 10.0.0.3)
wireport server label add 10.0.0.3 my-feature-flag
wireport server label remove 10.0.0.3 my-feature-flag
Each SERVER node periodically pulls its label list from the gateway and applies local changes (within ~30 seconds).
Supported node labels:
| Label | Effect on SERVER node |
|---|---|
docker-socket-published |
Exposes the local Docker socket on the server's WireGuard IP at TCP port 2375 (see below) |
When a SERVER node has the docker-socket-published label, wireport starts a socat gateway inside the server container. It listens on the node's WireGuard address (IP of wg0 interface, port 2375) and forwards to /var/run/docker.sock.
From your CLIENT laptop on the wireport VPN, set a Docker context to that address. Then docker and docker compose talk to the remote engine — you can ps, logs, compose up, and deploy workloads on the SERVER much like they were running on your own machine. Nothing is exposed on the public Internet; only peers on the wireport VPN can reach the socket.
Enable (from CLIENT):
wireport server label add 10.0.0.3 docker-socket-publishedUse the server's WireGuard IP from
wireport server list(e.g.10.0.0.3).
Wait for the next server sync cycle (~30 seconds).
Then, from your CLIENT machine, you can deploy full Docker Compose stacks — or run individual Docker commands — on the remote SERVER via its Docker socket, for example:
docker context create wp-server --docker "host=tcp://10.0.0.3:2375"
docker --context wp-server ps
docker compose --context wp-server -f ./docker-compose.yml up -dDisable:
wireport server label remove 10.0.0.3 docker-socket-publishedThe socat service is stopped and moved out of runit supervision so it will not restart until the label is added again.
Security: Anyone who can reach the server's WireGuard IP on port 2375 has full Docker API access on that host. Only enable this label when you trust all peers on the wireport VPN. The socket is not published through Caddy or the gateway's public IP.
| Purpose | Command |
|---|---|
| Remove a public endpoint | wireport service unpublish -p https://demo.example.com:443 |
| Adjust headers/timeouts | wireport service params new -p https://demo.example.com:443 --param-value 'header_up X-Tenant-Hostname {http.request.host}' |
| Remove service parameters | wireport service params remove -p https://demo.example.com:443 --param-value 'header_up X-Tenant-Hostname {http.request.host}' |
| List service parameters | wireport service params list -p https://demo.example.com:443 |
| List all published services | wireport service list |
| List SERVER nodes | wireport server list |
| Add a label to a SERVER | wireport server label add 10.0.0.3 docker-socket-published |
| Remove a label from a SERVER | wireport server label remove 10.0.0.3 docker-socket-published |
| Create more CLIENTs | wireport client new |
| Add a workload SERVER | wireport server up sshuser@140.120.110.10 |
| Tear down a SERVER | wireport server down sshuser@140.120.110.10 |
| Tear down a GATEWAY | wireport gateway down sshuser@140.120.110.10 |
Refer to wireport --help for the full CLI reference.
- The gateway container runs with privileged access for network configuration
- All traffic is encrypted using WireGuard
- Control traffic is encrypted (TLS)
- HTTPS is configurable for secure web access to exposed services
- The
docker-socket-publishedlabel exposes the Docker API on a SERVER's WireGuard IP only (port 2375). Treat labeled servers as fully trusted Docker hosts for any VPN peer that can reach that address
If you encounter issues:
- Check service logs:
docker logs wireport-gatewayordocker logs wireport-server - Verify firewall status & make sure all required ports are open
- Check status of the WireGuard network inside the GATEWAY and SERVER wireport containers using
wg showand other WireGuard commands - Check pingability of private services from inside GATEWAY, SERVER and CLIENT nodes
- If a private service is not reachable, make sure the container is running and check its logs; check whether the target container (in case of the SERVER workloads) is attached to the
wireport-netDocker network (wireport agent manages this automatically). - Declarative tunnels: after changing
wireport.service.*labels in your Docker Compose files, recreate the affected stack's containers, then allow up to ~30 seconds for the SERVER agent to reconcile. Checkdocker logs wireport-serveron the SERVER machine for publish/unpublish messages. - Docker socket label: after
wireport server label add … docker-socket-published, wait for sync then verify withdocker -H tcp://<server-wg-ip>:2375 infofrom a CLIENT on the VPN. Confirm socat is running:docker exec wireport-server pgrep -x socat(executed on the target SERVER node). server upreports "Not joined yet" but container logs show success: the bootstrap waiter checks for join config files inside the container. If join completed, the server is fine — inspectdocker logs wireport-serverand retrywireport server list. If server bootstrapping fails, tear down the failed server (wireport server down ...) and bootstrap it again.
For testing HTTP, UDP, TCP tunnelling, you can use the automated test scripts provided in the tests/ folder.
Before running any of the tests, you may want to specify wireport profile (if you're using several profiles on your machine), e.g.:
export WIREPORT_PROFILE=development./tests/http-tunnel.sh 140.120.110.10 -vhere:
140.120.110.10is the public IP of the GATEWAY node-vis a flag, enabling verbose logging
Each test:
- Starts a local server on your CLIENT node (your local machine)
- Publishes a service on the GATEWAY node to expose the local server to the Internet
- Tests connectivity with 3 requests that travel CLIENT → [over Internet] → GATEWAY → [over WireGuard VPN] → CLIENT
- Verifies responses and tears down the server automatically
Sample output for a successful http test run:
🧪 Wireport HTTP Tunnel Test
================================
Public:  http://140.120.110.10:32421
Local:   http://10.0.0.2:8080
Mode:    VERBOSE

📋 Step 1: Checking wireport version...
wireport version v0.9.7-dev (commit: 40b131b, date: 2025-10-05T19:07:07Z, arch: amd64, os: linux, package: unknown); db path: /Users/multionlabs/.wireport/dev-meta/wireport.db; profile: development

📋 Step 2: Publishing service...
✅ Service http://10.0.0.2:8080 is now published on

                http://140.120.110.10:32421
✅ Service published successfully

📋 Step 3: Starting local HTTP server...
✅ Local HTTP server started (PID: 74849)

📋 Step 4: Waiting for service to be ready...
  Waiting 3 seconds for service to initialize...

📋 Step 5: Testing HTTP tunnel connectivity...
  Test 1/3: [HTTP-SERVER] "GET / HTTP/1.1" 200 -
✅ PASS
    Response: OK
  Test 2/3: [HTTP-SERVER] "GET / HTTP/1.1" 200 -
✅ PASS
    Response: OK
  Test 3/3: [HTTP-SERVER] "GET / HTTP/1.1" 200 -
✅ PASS
    Response: OK

📋 Step 6: Cleaning up...
  Unpublishing service...
✅ Service http://140.120.110.10:32421 is now unpublished
  Stopping local server (PID: 74849)...
✅ Cleanup completed

📊 Test Results
===============
Tests passed: 3/3
🎉 ALL TESTS PASSED! HTTP tunnel is working correctly.If you find this project useful, please consider sponsoring the development via GitHub. Thank you!
Contributions are welcome! Please feel free to submit a Pull Request.